

Prevent losing your blog’s readership to more dynamic video bloggers. Knowing how to video blog or vlog, you can increase your exposure, better engage with your audience, and drive new traffic to your website and blog.
omniworldwide.com gathered the following steps and tips to help you create a successful video blog and boost your audience engagement to new heights.
Step 1: Content
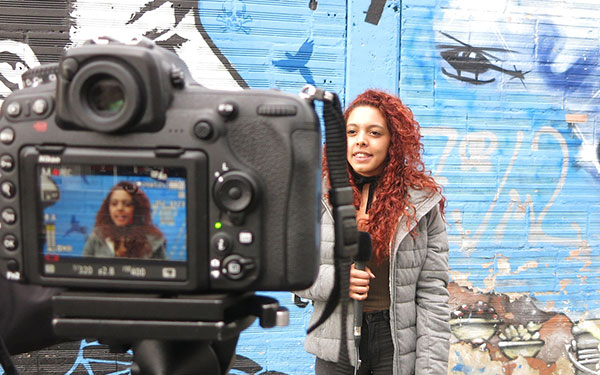
Lights, Camera, Action! Very much like filming a movie or video, the content you want to present to your viewership can be scripted, rehearsed, and produced.

When planning your content, consider the three main types of video:
Awareness – These are videos with high-entertainment value and broad appeal. Some examples are:
- Company Culture (Meet the team)
- Round-ups (Top 10 Restaurants in Atlanta… or 5 Must-See Vacation Spots…)
- Behind the Scenes (Give insight into an exciting process, project, or situation)
- Interviews (Great for sharing values, insights or thoughts)
Engagement – Here, you are attempting to generate a reaction from your viewer. Some examples are:
- Video emails (Marketing and salespeople are leaning on video to cause customers to take action of some sort)
- Funny Videos/Skits (Videos with humor or great stories have a far better chance of being seen and shared)
Education – These videos set out to teach your viewer a skill or convey useful information they can use. Some examples include:
- How to (These videos are powerful tools that answer a viewers question)
- Product Review (Give your audience an honest take on new or popular products)
- Live Talks or Presentations (Allow viewers to assist a talk or a panel)
- Q&A (You can ask someone questions or answer the viewer’s questions)
- Announcement (Share your ‘big news’ with your audience – generate excitement/curiosity)
Your video content has the potential to attract new leads and convert them into paying customers.
Step 2: Audio
Poor audio can turn your viewers away in an instant. Even if your video quality isn’t the best, but the message is compelling, you can have this quality audio stripped and convert the content into a podcast episode.
Nevertheless, be mindful that audio and the ability to understand the message is vital, so consider the following:
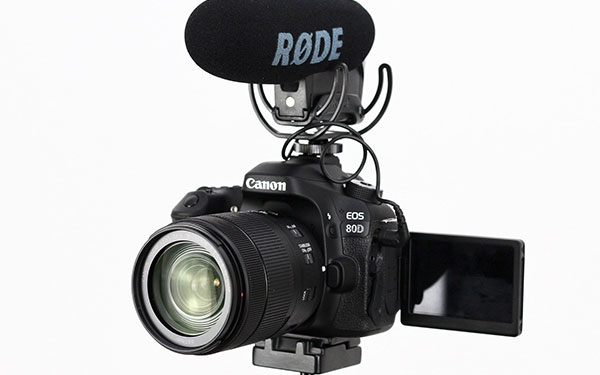
MIC in – Most camcorders on the market come with a MIC in port. Podcast recording allows hard wired mics, but wireless and tie clip microphones provide ultimate freedom and ease of use when you are on location or recording while walking and talking. Do a simple Amazon review and buy the best external microphone to ensure you have high quality audio.
If your camera doesn’t have a MIC in port, record your audio on a separate device, and sync it with your video in post-production.
Note: internal microphones on camcorders are notorious for picking up more of the cameraman or recording people in different positions at different levels.
Tip: If using a separate device, you can sync your audio to your video by using a clapper/clapboard (like they use in the movies) or clap your hands. The audio spike will give you a starting or reference point to sync audio with video.
However you choose to record your audio, find your “sweet spot” by practicing takes and experimenting with positions and sound levels.
Step 3: Camera
Before you run to the store to buy a camera, take a look at the device you are using to read this blog post. Chances are, you already have a camera to get started with. In fact, most cameras on your PC or Mac will do just fine to get you started producing content.
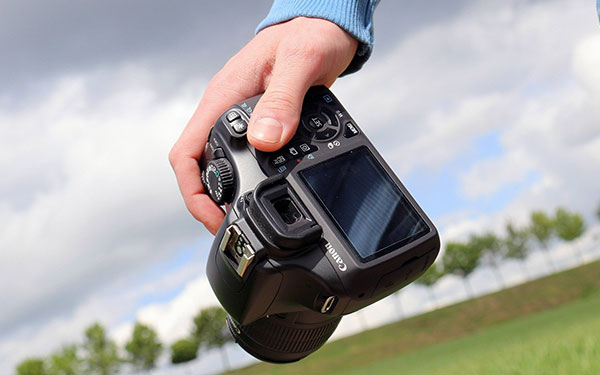
As you develop your vlog, you will likely want to expand to an independent camera that you can set up anywhere at any time. When shopping for a camera, take the following into consideration:
Sound – Look for a camera with an external MIC in port. (See Step 2)
Battery Life – Some cameras can only be charged with a USB or power cable, which may hinder its flexibility and your use. Look for cameras that allow for replacement batteries that can be independently charged, which are highly useful when doing extended time shoots.
Storage – You can use a camera with an internal HD memory, or one that uses SD cards. The difference is that you need a cable connection to transfer data with a camera using internal memory, while SD cards allow more effortless transfer between camera and computer.
Size – If you are prone to filming anywhere at any time, you’ll want a camera that fits in your pocket and can be started at a moment’s notice.
Note: The ideal camera is one that can be mounted on a tripod or fits in an adapter affixed to your tripod.
Step 4: Lighting
Unless you want to be compared to a 1990’s camcorder home video, your lighting is of extreme importance.
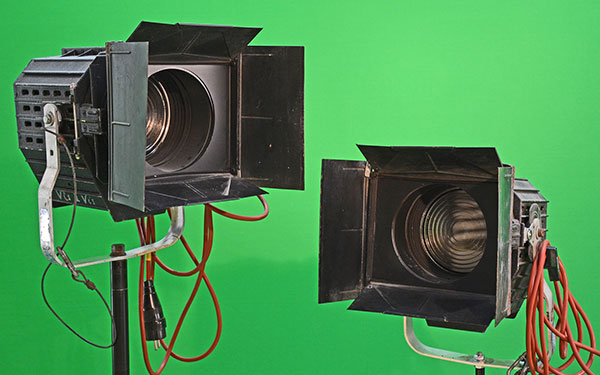
When setting up your lighting, these three positions will dramatically improve the quality of your video:
Key Light – On your front right at a 45° angle to the camera (this is your brightest light)
Fill Light – On your front left at a 45° angle to the camera (50-75% of your key light intensity)
Back Light – On your back right in line with your fill light (low intensity, preferably diffused/soft)
The primary light is the key light. It acts like the sun radiating downward and casting shadows. Shadows from the key light are filled with the fill light. Back light prevents dark shadows from appearing on your shoulders and creates a natural lighting appearance overall.
Tip: When filming outside, position your camera, so the sun is in the same position as where your key light would be positioned.
Step 5: Captions
The vast majority of your viewers will be watching your videos with the sound off. You can significantly increase your engagement rates by adding captions to your video.

Consider the vastly different scenarios under which your viewers will be watching your video. Some may be at work or school, while others may be in a space full of loud people or ones they prefer to not disturb.
Note: According to Verizon Media and Publics Media, 80% of consumers are more likely to watch through an entire video when captions are available. And 37% of video viewers reported that while originally watching without sound, the visible captioned words encouraged them to turn the video sound on because it made them more interested in the video.
Step 6: Screen Capture
There are times you may not need a camera to produce a vlog. If your intent is to teach, give tutorials, or showcase product features, it can be effective to narrate in concert with a series of images, videos, or screen captures.
The following software will help you record your “screen” actions:
Snagit – Works on PC and Mac. For free trial / purchase, visit techsmith.com/screen-capture.html
Apowersoft – Works on PC and Mac. Free App download at apowersoft.com/free-online-screen-recorder
Camtasia – Works on PC and Mac (captures + edit). For free trial / purchase, visit techsmith.com/video-editor.html
Tip: Zoom, Skype, and other meeting places or online interviews can be recorded using screen capture then edited into a broader concept video for your vlog. Zoom has a built-in recording feature, or enables you to live stream and webcast the conference / interview.
Step 7: Editing
“Less is more!” While you will learn over time how to edit your videos and create your own style, too many cuts and edits can make your videos seem busy and distracting. If you cannot hire a video editor, download some editing software and start practicing.

- Beginners may find Filmora9 easy to use. This freemium program works best on Mac, and can be downloaded at filmora.wondershare.com/video-editor/
- If you are using a Mac, iMovie is a free video editing software that comes preloaded on your Mac or iPad that you can use to perfect your videos.
- If you are using a PC, OpenShot is a free and straightforward editing software found at openshot.org
Regardless of the editing program you choose, run tests, and the more familiar you are with the controls, features, and editing capabilities, the better your final product will be.
Step 8: Distribution
Once you’ve recorded and edited a video blog, the challenge is to get it to as many people as possible. While it is highly recommended to start with YouTube due to its reach, you may enjoy the controls or features offered by Vimeo. Get familiar with the platforms, and you may find distinct use cases for them both.
Once your videos are live, add your vlog links to your social media profiles or posts (Facebook, Twitter, TikTok, Instagram, etc.). You do not want to spam people, but you can also send your Vlog in private/direct messages to create more personalized engagement.
If you maintain a written blog, you can write support material about your vlog and embed links in your content to drive more traffic to your videos.
Tip: You can create a free profile on YouTube, it’s free, and no special permissions are required to upload videos.
Successful Video Blogging
In this article, you discovered information and tips to help you produce a successful vlog with quality production that engages your audience.
Knowing how to create an impactful vlog allows you to better connect with your audience and drive traffic to your blog, website, and marketing funnel.
Producing low quality or poorly messaged vlogs can kill your chance to spread your message or gain a following / customers.
Sources:
b2b.verizonmedia.com/c/verizon-media-sound–1?x=vOJKbY
collegepuzzle.stanford.edu/5-easy-steps-for-video-blogging-vlogging/
blogs.egu.eu/geolog/2016/04/04/vlogging-101-a-beginners-guide-to-video-blogging/
lifewire.com/video-blogging-guide-488155
Omni Worldwide – Atlanta Video Production Company
(678) 744-5960